Blender
A blog about my work in Blender and 3DS Max, plus some other interesting stuff from world of 3D art...
Monday, December 19, 2016
Saturday, November 5, 2016
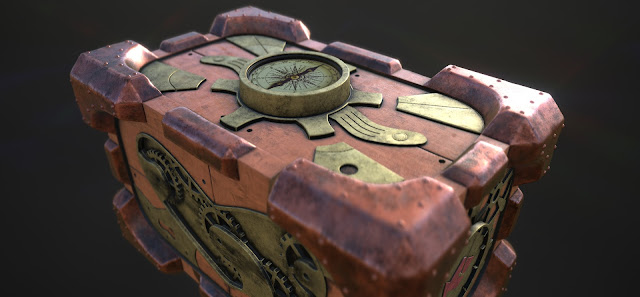
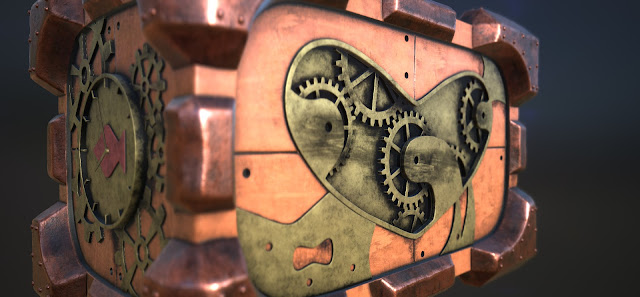
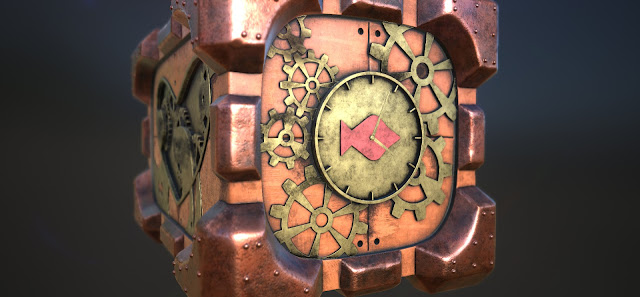
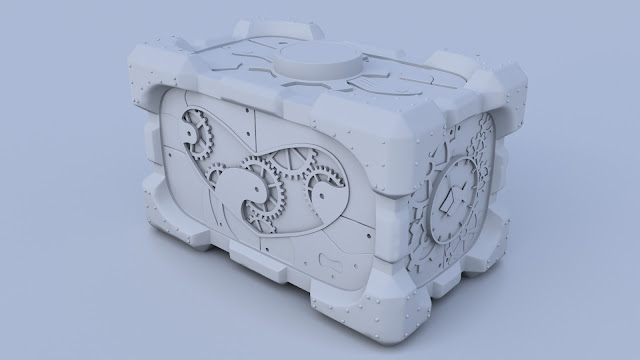
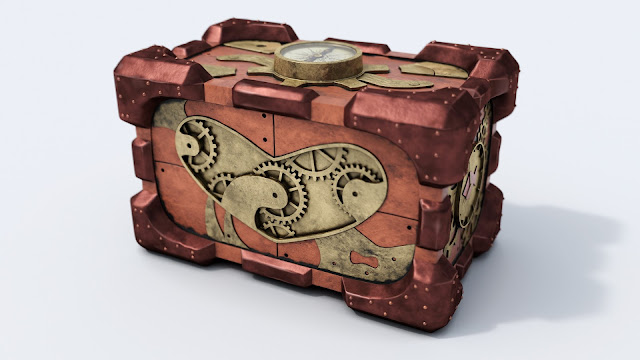
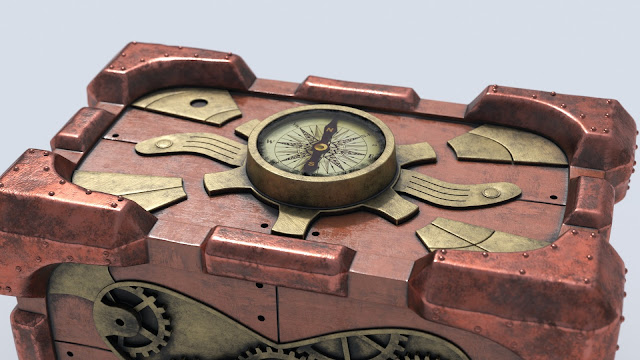
Steampunk Giftbox
Modeled with Blender, textured with Substance Painter
Substance Painter viewport renders
Blender Cycles renders
Cycles materials
Substance Painter textures in Cycles
And once more, a photo composite... ;-)
Substance Painter viewport renders
Blender Cycles renders
Cycles materials
Substance Painter textures in Cycles
And once more, a photo composite... ;-)
Steampunk Giftbox by herask on Sketchfab
Tuesday, November 1, 2016
Capital Ship Turret
Blender 2.78, Substance Painter
sorce: http://www.deviantart.com/art/Capital-Ship-Plasma-Turret-286577719
sorce: http://www.deviantart.com/art/Capital-Ship-Plasma-Turret-286577719
Thursday, September 1, 2016
Compositing rendered object onto a photograph - part 2
How to composite a 3D model onto a photograph
(and get away with it)
Part 2 - Rendering and compositing
RENDERING
After
taking a closer look at our background photo I saw it's not very sharp, like
it's out of focus. That's actually good since we can render the planes at lower
resolution and save some rendering time. We will scale the rendered image up to
photo's resolution which'll give it compressed look like it came out from
camera. I like to do it that way even when photo is in focus, because even then
you can see some compression and blur at higher zoom levels, and perfectly clean
render is something we'd like to avoid.
So,
set the render resolution to 66% (2/3 of original size). Sample count at 500
samples should be enough (we'll add noise later anyway), and set bounce count
as in the image which'll speed up the render even further. Higher bounce count
is more important in interior shots. Lastly, set ground plane to be invisible
to camera. We only need it to bounce light to airplanes.
Hit
render, and go stretch your legs a bit... ;-) When it's over, save it as PNG,
check RGBA for transparency, 16 bits for more color information (when adjusting
brightness) and leave compression at 15%. Here's my result:
Quick
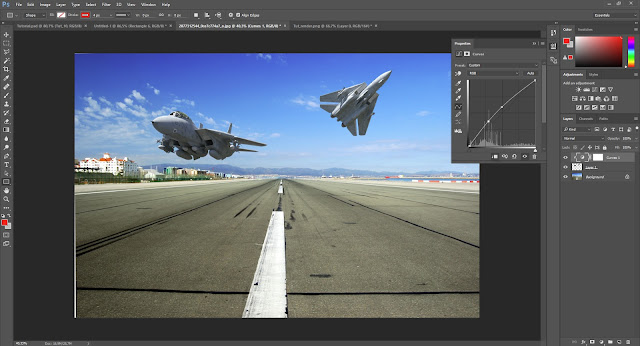
test revealed that the airplanes are a bit underexposed, but a slight curves
tweak makes it better. Now we're going to add shadow underneath the airplanes.
Back in Blender make ground plane visible to camera again but this time hide
the airplanes. We don't need them to render anymore but we need their shadows.
Change ground plane's material to pure diffuse and completely white, and hit
render again. Stretch legs...
NOTE: This particular airplane model
consists of many, many parts. Making each and every one invisible to camera
would take too long, so I used render region to render only bottom part of the scene
with the ground plane.
The result:
Looking
good. There's a slight bluish hue from sky color in the shadows which should be
OK and white parts are white enough not to cause problems when multiplying
over a photo. Again, save as PNG, RGBA, 16 bit color depth and 15% compression.
We're off to compositing. I use Photoshop but you should be able to follow in
GIMP as well.
COMPOSITING
Congratulations,
you've made it this far. Now let's finish our scene. Load render and shadow
images into Photoshop/Gimp. Remember, we have rendered both images at 66% of
needed resolution, so scale them back up to match the resolution of the photo.
Put „shadow“ image above the „airplanes“ image and use Multiply as a blending
mode. The shadow looked a bit weak, so I duplicated shadow layer still in
multiply mode and lowered the opacity to 45%.
Looking
good so far. Now duplicate airplanes layer (to save the original, just in case - I
like to keep steps as I go in separate layers) and apply slight gaussian blur
to match our photo a bit more. I used value of 0.3 pixels. Then, use Sharpen
-> Unsharp Mask. I used value of 180%. That should mimic camera's
compression. Experiment with values in your scene to achieve desired result.
Not
bad, but it looks like the airplane needs more contrast to match contrast of
that building. I have used another adjustment layer with levels. The effect is
subtle but looks closer to photo. Another thing which bugs me is that the airplane
shadows look too small and too up front, while I feel they should be bigger and more
behind the airplanes, so I moved shadow layer slightly up and I'm more satisfied
with the result. Now it really looks like they're flying low.
As
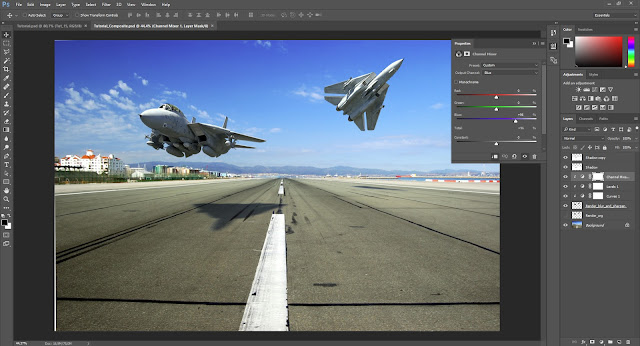
for matching the colors, it looks quite good as it is. I've only lowered blue
channel of airplanes layer to 96% via adjustment layer, but we've could've
gotten away without that step. Still, planes have more gray tint now to match
reflected color of the ground.
Again, subtle
effect but it adds to overall realism of the scene. Speaking of which, every
photo has noise. Some more, some less and is unavoidable. This photo has very
little because most of it is well lit, but still there's a fine grain visible
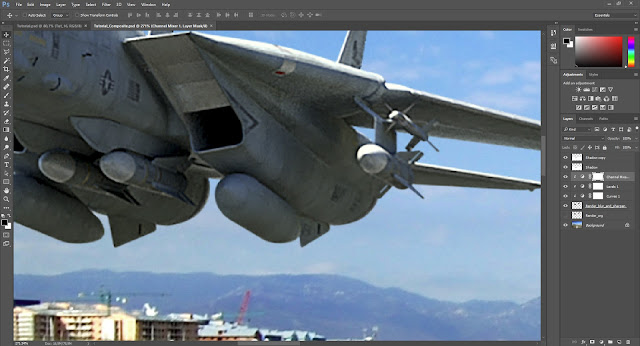
in the sky and mountains. If you zoom in to closer airplane you can see we already
have enough noise and is subtle enough and I'm actually happy as it is.
So
the next step isn't really needed in this case, but I'll show you anyway so you
know how to do it. Before I would just duplicate subject layer and add few
percents of noise in Photoshop. But the problem with this simple step is that
this added noise is pretty small, colored and doesn't always match the photo
you're compositing into. Good thing there's a solution for almost anything.
Since we already
got noise on our airplanes when applying blur and sharpen, I'll be using
original render layer just so you can see the difference.
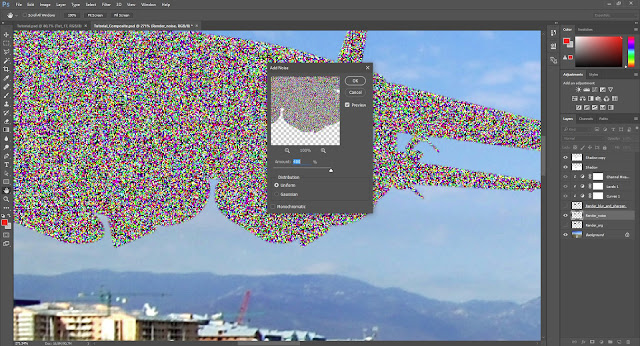
First, duplicate
airplanes layer and then go to Filter – Noise – Add noise and enter maximum
amount, in Photoshop it's 400%.
Now,
give it a bit blur, lower the saturation and set blending mode to overlay. The
noise won't be sharp anymore, color is not needed here and blending mode will
make noise more visible in dark areas and less visible in bright spots, just as
it should be. Finally, lower the opacity of the layer enough so the noise looks
similar to that on the photo. This is my result:
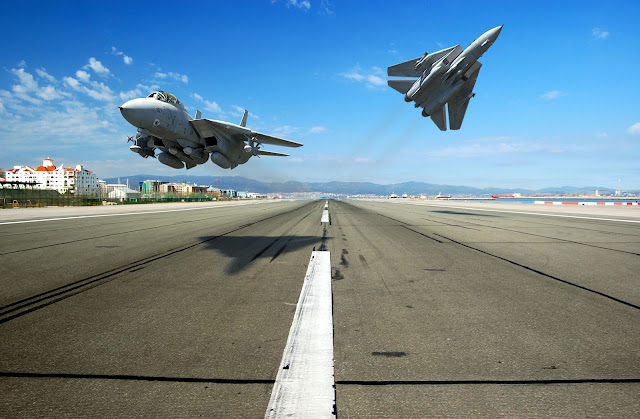
And
that's about it. We've covered most important stuff, but if you want to take it
one step further you can add all kind of effects, props, matte stuff... Your imagination
is your limit. On my final composite I have added exhaust trails (painted with
brush, blurred and lowered opacity), heat haze (filters – spatter, soft edges
on selection) and gave some directional blur to the airplane that's breaking off formation.
FINAL RESULT
I
hope this tutorial gave you some info on how to do composites. Although I
showed you how to do it in Blender and Photoshop, principles apply to any 3D
modelling app and photo editor you usually use. Cheers and thx for sticking
this long... :-D
Wednesday, August 31, 2016
Compositing rendered object onto a photograph - part 1
How to composite
a 3D model onto a photograph
(and get away with it)
Part 1 - Preparation and Scene building
A friend of mine asked me how am I
making those composite renders, and since it seems that I've only been doing
those lately, I decided to write a small tutorial on the subject. I'll be
showing you my method, which is slightly different than what Andrew Price
showed on his Blenderguru site. A good thing in doing CG work is that there's a
multiple ways to achieve the same result, so consider this as just another way
to do so. In the end you're free to use whatever method you find most
comfortable to work with, as long you're happy with the result.
When
compositing rendered 3D models onto a photograph there are a few things you
need to consider to get a believable result. I tend to think of all of them to
be important (more or less), so in that order, here they are:
-
lighting
-
perspective
-
shadow
-
color
match
-
noise
Lighting
This
one is pretty obvious. Set wrong light angle and/or direction and it'll stick
like a sore thumb. That's also the case with intensity and contrast, but that
can be tweaked in post-processing phase. Nevertheless, the more you can match
right away the less work you're going to need to do later.
Perspective
Perspective
is also important in a way if you don't match it correctly it'll be obvious
that the rendered object doesn't belong into the scene. While you can get away
with only close approximation it's always good to try and match the perspective
as close as possible.
I use two ways
to do that: first is EXIF information in a photo that I'm compositing into:
camera type (for sensor size) and focal length (you can also find aperture
size, ISO and shutter speed useful if you're using physical camera add-on, but
it's not crucial). Then I enter those values into camera properties in Blender.
After that, I manually position the camera where I need it to be.
Second is BLAM
camera add-on, which uses grease pencil to draw perspective lines on the photo
which are going to bee used to calculate focal length. It also positions camera
accordingly in world space (vertical and horizontal rotation), but I found it
to bee hit and miss. For best result use uncorrected photos, otherwise
calculation will not be accurate. I'll be showing you both methods in this
tutorial.
Shadow
Also, very
important, but not that hard to do. Once you get the light direction right,
it's just about catching that shadow for compositing.
Color Match
Rendered
element needs to match the rest of the photo colorwise. Discrepancy can occur
if you're using an HDRI which has slightly different lighting than the photo.
So, for instance, the photo could have reddish overall color, and the rendered
element ends up with slightly bluish tint. For more immersion you're going to
need to reduce blue color on the rendered element to match the photo. This is
easily done in post-process phase.
Noise
I
add noise for even more realism, because nothing screams CGI more than
perfectly sharp and clean photo. I found a good and simple method to add noise
that matches that in the photograph, and it can be tweaked as desired.
PREPARATION
Before
starting, obviously you need to have an idea what you want to do. Right now I'm
into airplanes so I'll be making a scene featuring one. So, first, we need to
find a model we want/like. For this tutorial (because I like it A LOT) I'll be
using Chris Kuhn's newest F-14D fighter plane model. Since it's a paid model,
you can download his free F-18 model from Blendswap (or any other you'd like).
Second,
we need a scene. Because aerial composite wouldn't feature a shadow (duh!)
we'll use a ground photo, preferably that of an airport or something. I have
found a good photo that matches my idea using www.allthefreestock.com. It's a
search engine for free stock stuff, like images, sounds, etc... that can be
used for commercial and non-commercial purposes. Check it out...
And this is the photo I found:
Photo credit: Willtron via
Visualhunt.com / CC BY-SA
It's
a Gibraltar airport runway. It's nice that there was an airport name next to
the photo, because it'll help us to match the size of the airplane to the size
of the runway. With no close objects for reference you can easily end up with
an RC model on the tarmac instead of full sized plane... ;-)
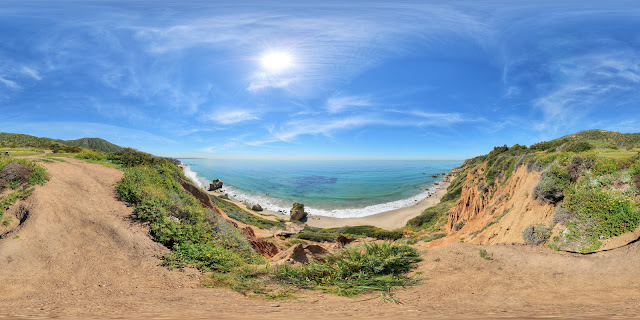
You'll also need some HDRI that matches the photo. This
one looks close enough:
http://www.hdrlabs.com/sibl/archive.html, Malibu
Overlook
It's
not perfect, there are more clouds in the sky here, but because the airplane is
not as reflective as a car for example, we can get away with it. I think the
sun's angle and the sky color are OK.
Finally
we can start creating our scene...
CREATING
THE SCENE
Now
we're coming to the real stuff. We're going to match the perspective of the
photo and set our camera first, so we can position the airplane to match our photo.
Add a background photo you downloaded and set its view to camera. Then add a
camera and switch to camera view. You can rotate the camera to be parallel with
Y-axis right now, since the one on the photo is also parallel to runway. Also,
set render resolution to match that of the photo to avoid distortions:
Now
I'll show you both methods I use for matching the perspective. I always use the
EXIF information first, whenever I can. If there's no EXIF embedded in a photo
only then I use the BLAM add-on. So first, the EXIF method. For this particular
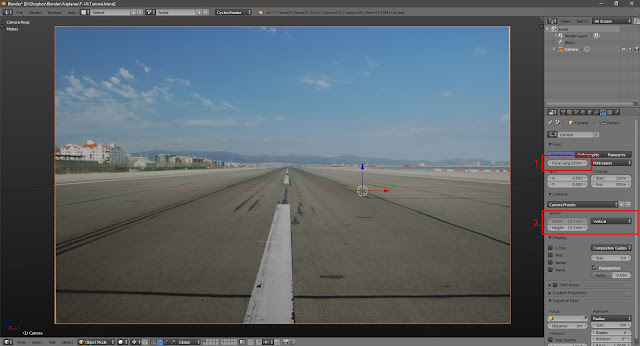
photo the EXIF information looks like this:
We can see the photo was taken with Nikon D40 camera at 18mm focal length. Quick google search tells us D40's sensor size is 23.7 x 15.5 mm. Now we'll enter those values into camera properties:
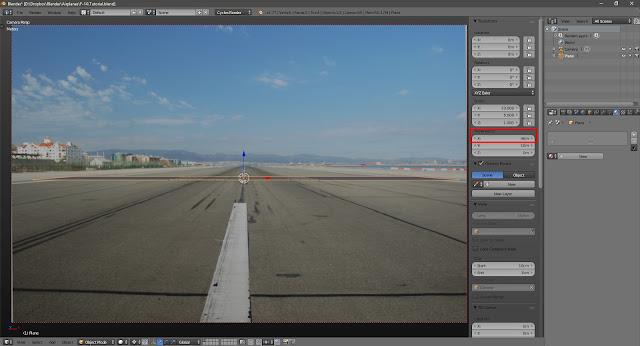
The
perspective was OK, I just needed to rotate the camera manually so the grid
lines matched the markings on the tarmac. You can see green Y-line near the
right hand side black line. Perfect match.
NOTE: If you're using a physical camera
add-on you can also enter shutter speed, ISO and F-number values, which should
help with exposure. Without that we'll just eyeball the lighting intensity.
Now
the BLAM method. You can find the add-on here: https://github.com/stuffmatic/blam. Right now it
isn't really needed, but eventually you'll come across the image with no EXIF
info and this add-on will help a lot.
A
few things to consider: BLAM uses X and Y-axis on the photo to determine
relations to X and Y-axis in Blender scene. That's why we need to draw 2 lines
for X and 2 lines for Y-axis on the photo which BLAM will use when calculating
perspective. Because of that it's important that you find lines in the photo
that you know/can tell are perpendicular in real life, otherwise calculation
will be off.
First,
go into Movie Clip Editor in Blender and load our background image. Under
T-toolbar -> misc there are BLAM settings. In N-toolbar, scroll down to Grease
Pencil and add a new layer, change stroke color to red (for X-axis) and draw
two lines on the photo that match X-axis. Do the same for Y-axis: add new
layer, change color to green and find two lines to draw on. When you're done,
hit „Calibrate active camera“ in BLAM settings in T-toolbar.
The
add-on will automatically enter calculated focal length into camera properties
(fig. 3.). As you can see, it calculated focal length pretty accurately
(accuracy will depend on how precise you draw the lines, whether they're
perpendicular in real life and if the photo has significant lens distortion).
Obviously EXIF data will give you exact values, but without those BLAM should
get you close enough without tedious eyeballing.
Just to get the
scale right, I googled the runway size of Gibraltar airport (46m) and added a
plane with the width of the runway. Next, moving only camera, I positioned
calibration plane to sit between the runway edges on our photo.
That put blender
camera at around 1.75m height. I know that center of the runway is slightly
elevated compared to its sides, to facilitate rain drainage, so taking that
into account I could lower both the camera and the runway edges cca 10cm down
which would make things even more accurate but the difference doesn't really
show here so I left the camera as it is.
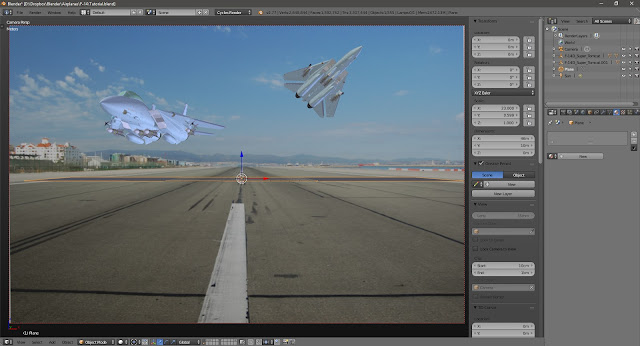
Now we are going
to import our model, so we have something to use as a reference when matching
the light. I decided to add two airplanes in really low flight above the ground
coming toward the camera. Looks better than featuring parked plane with nose or
exhaust tubes looking at the camera. Sideway shot would be out of place at this
spot on runway, IMHO.
I
made one of the airplanes break off formation, just to add some action to the
scene.
Now
we set up the lighting. In environment tab add 3k HDRI from downloaded ZIP, and
set up light intensity control in node editor like this.
After some
experimenting it was clear that with only HDRI we wouldn't be able to get
strong shadows and the overall light had too strong bluish hue, so I had to add
the sun lamp as well. I used shadows on the building on the left hand side of
the photo to determine the sun's position. The way I see it, it's coming from
behind on the left, at roughly 50° angle. Luckily, sun on the HDRI is at
similar angle, and it was just a matter of rotating HDRI to correct position.
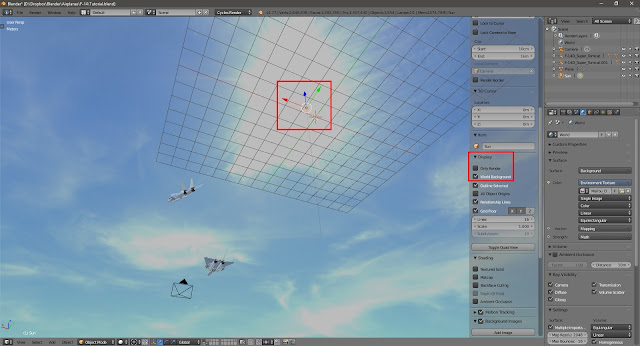
Use „World background“ under Display properties in N-toolbar to see the
environment texture in viewport.
I adjusted HDRI
strength to be just enough to get some environmental light on the airplanes and
not to be too strong. All of this tweaking will depend on the lighting on the
photo you're compositing to, and the HDRI you're using. The sun ended up with
strength of 10. The ground will probably be overblown but it looks right on
airplanes so for now I left it that way.
Before
we finalize the lighting part, we'll add a ground plane to provide bounced
light from the ground to light the airplanes from underneath more realistically,
and later to serve as a shadow catcher. The way I like to do it is, I add a
plane large enough to cover the ground around the airplanes, UV unwrap it from
view and use our background photo as a texture in color slot to make bounced
light have color of the ground, instead of just giving it flat dark gray color.
Here, we could probably get away with it, but when you're going to have more
varied ground in terms of color and details, flat color just won't cut it,
especially when rendering highly reflective object like a car.
Now
add large plane, apply scale, in edit mode subdivide it at least 40 times (W
-> subdivide), and unwrap it from view. The reason we're subdividing ground
plane is, for some reason Blender distorts the texture if the plane isn't
subdivided. I don't know why is that happening but you can see bellow how it
looks with and without subdivision. If the texture still looks distorted
subdivide it some more and again unwrap from view. Here, I used 60 subdivisions.
It's
still a bit distorted, but it doesn't matter that much. I also added glossy
shader to make the ground some more reflective. This step is probably overkill
but I still like to do it for added realism. This is my final setup:
As
I thought, the ground was to bright, so I had to lover the texture's value to
more reasonable level. Now reflected light looks good on airplanes and the
ground plane won't be rendered anyway so I consider this done. We're ready to
render the airplanes!!
Continue to Part 2 - Rendering and Compositing
Monday, August 22, 2016
F-14D Super Tomcat
I made these renders for Chris Kuhn, the creator of this awesome piece of modeling. His attention to details is mind blowing. Check for more images and WIPs on his Facebook page.
Rendered in Blender, composited in Photoshop
Rendered in Blender, composited in Photoshop
Thursday, July 21, 2016
Subscribe to:
Posts (Atom)
